Inside: Seven fantastic art ideas (+ tips) for your winter art camp at home. Not only is it a fun thing to do with kids, but it’s also a great opportunity for creative expression and development of balanced thinking.
There are days when I enjoy slow, creative projects with my children—be it painting sticks or cutting cookies out of dough. And then there are the other days when my calendar is packed, and I simply don’t have time or motivation to do anything remotely related to art.
The problem is when I think back and realize it’s been ages since the last art project, and now I don’t have enough motivation to get started.

Recently, when I was talking to a mom-friend about how much art we do with our children, and she asked about our latest projects for inspiration. “Well…,” I mumbled, “we painted a stick” (wasn’t it a while back though?), “and we made gingerbread cookies and Christmas ornaments… Hmmm….”
That’s when I realized we need a DIY Art Camp, aka Art Bootcamp. There is a good reason why boot camps are so popular. It’s an easy way to get back into the game, stay accountable, and get the creative juices flowing again. I find that once we start, it’s hard to stop. One art project has the potential to sprout into three new ones. It’s a great adventure!
And for another fun activity, print out these winter drawing prompts for your kids.
When it comes to doing art projects with my children, my simple goal is to give them an opportunity to think creatively. It’s not about certain results, but it’s about artistic expression, developing balanced thinking, and nurturing their natural creative dispositions.
I believe we are all born creative. We often forget how creative we are because we don’t get an opportunity to express our creativity.
DIY Art Camp
I find that the easiest way to set up a DIY Art Camp is to pick a theme, such as a Fairytale Art Camp or an Art Around the World Camp. Since this camp is taking place in the winter, we decided to use the winter theme this time.
How to prepare
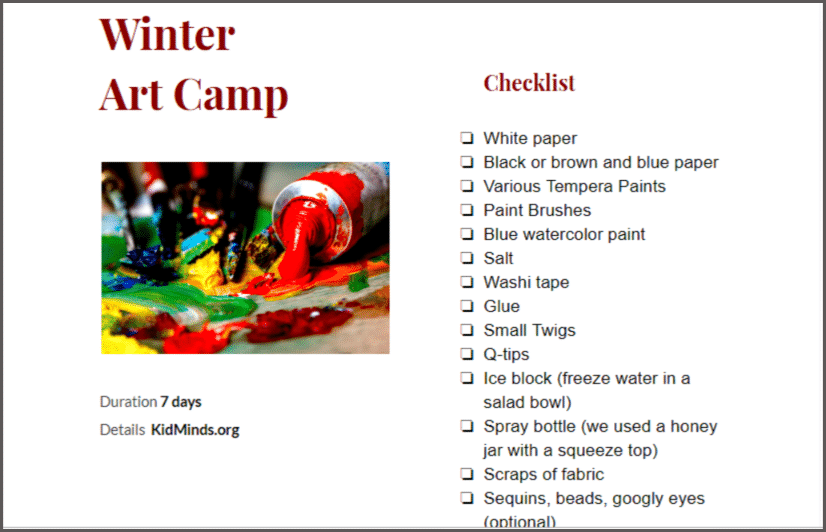
Go over the supplies and round everything up. You can click on each day’s art project and look over the supply list.
For your convenience, here is a printable checklist of the supplies needed for the whole camp. I added it to the Kid Minds Library of Resources. If you are already a Kid Minds insider, you can find the link and password in your newsletters. If you are not, you can click here to add your email to our list. No SPAM. Pinky swear.
Presentation
I don’t know about your kids, but mine don’t like it when I announce, “We are doing a seven-day camp starting Monday.” They start groaning, “I already have enough things to do.” Or they state matter-of-factly, “Not interested.”
When kids go to art camp outside the home, they are trapped in participation. Unless they want to sit in a corner by themselves, bored out of their minds, they need to join in. But at home, kids have lots of fun options. They can play with their favorite toys, read an exciting book, or play outside.
I learned my lesson from past experiences, so now I round up the supplies and start doing the first project on my own when all my kids are nearby, such as after a meal (save the cleanup for later). Someone or other is sure to come over and say, “This looks like fun. Can I try?” Then someone else might join in. Sometimes, there might be a late adaptor, a kid who looks at everyone’s finished work and says, “Hey, what about me?”
It makes the experience a little less organized and straightforward but ultimately more nurturing because everyone feels they chose to do the activity. The good news is that the second day is easier because the art muscles are already activated and itching for action. By day #3, my kids usually beg me to start right now.
You decide which approach would be most effective with your kids.
The plan
Do one project each day for a week. Click on each of these links for details, and have fun!

Day 1: Winter Landscape with Textured Trees
Those winter landscapes look stunning, and you won’t believe how easy they are to assemble. First, you paint the background with shades of blue (we mixed blue tempera paint with white) and purple (a mix of blue, red, and white). Then, you tear brown paper with your hands to create tree trunks and branches. Glue them down. Tear and glue white paper for a snow effect. That’s it!
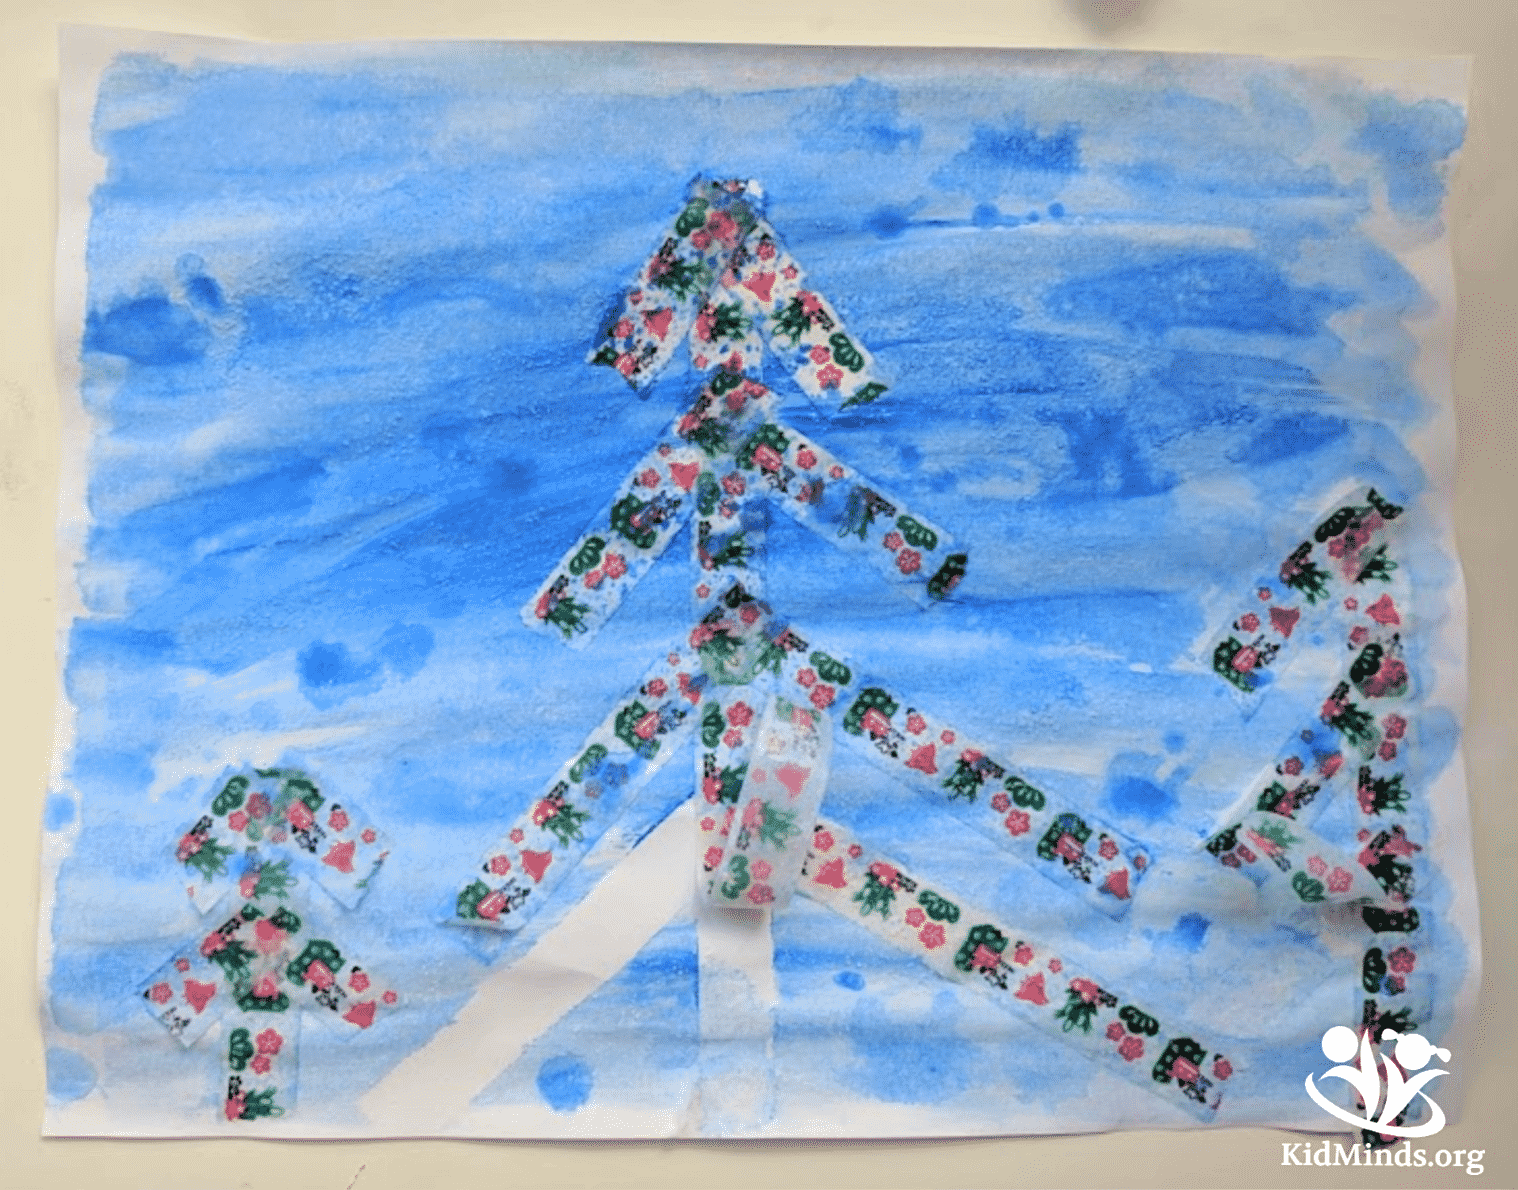
Day 2: Winter Wonderland Art
This project combines salt painting with washi tape art. Tape some evergreen tree shapes on paper and cover the whole page with liquid blue watercolor. Sprinkle kosher salt on top for a snow effect. Once it dries, remove the washi tape. You can decorate the trees if you wish.
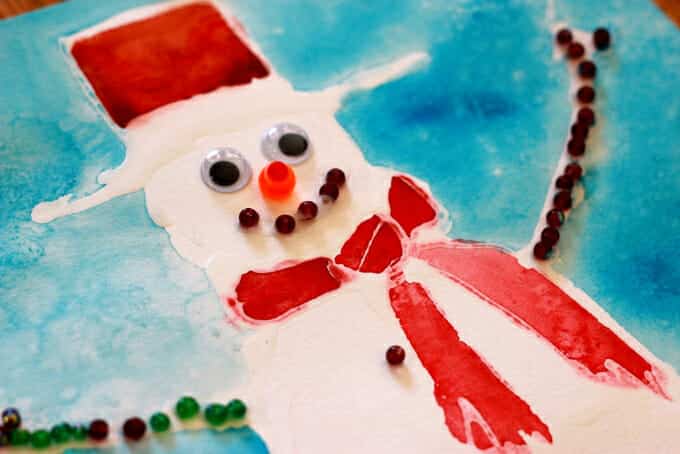
Day 3: Glue Resist Snowman Painting
The bad news is that it’s a two-day project if you want to do this right. The good news is that if you are impatient, as we are, it’s possible to do it in one day, and it still looks great. This is how we did it. We drew a snowman with glue on painting paper. We saturated the page around the snowman with water by painting it with a wet brush. While still wet, we added blue watercolor and sprinkled it with salt. The final touches: decorating the snowman!

Day 4: Winter Tree Art
Arrange twigs into a tree shape on a piece of paper and glue them down. Dip a Q-tip into white paint and add the snow effect. That’s it! Twigs, glue, white paper, and a Q-tip add up to a super fun and simple art project. (Your kids might get carried away and fill a few more pages with Q-tip art).
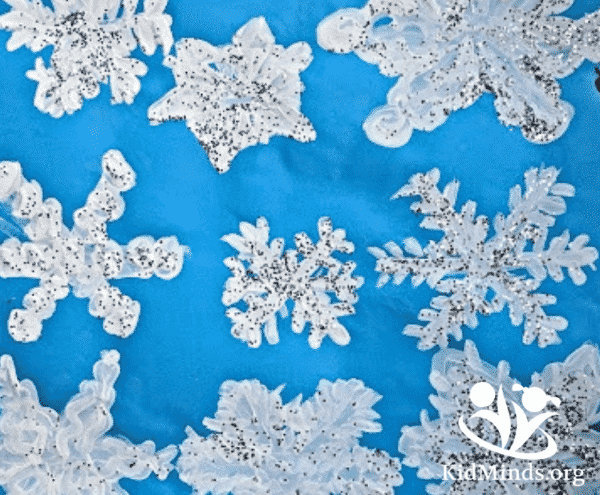
Day 5: Glittery Snowflakes
Art doesn’t have to be difficult to be pretty. Can you fill the page with tempera or acrylic snowflakes? How many different designs can you come up with? Just experiment and have fun. Shake off the performance anxiety. With snowflakes, you can learn a lot about symmetry and shapes. (How can ice crystallizing on one arm ‘know’ the shape of the other arms on the flake?)

Day 6: Ice Sculptures
Let’s change things up a bit. After today’s art session, you won’t have a piece of art to show for it, but I promise you’ll have lots of fun nevertheless. We put water in a large salad bowl outside, and once it froze put it on a large cookie tray. My kids sprayed the chunk of ice with colors (using dropping pipettes and spoons), poked it with popsicle sticks, and sprinkled it with salt. Our art melted, but it was beautiful while it lasted.
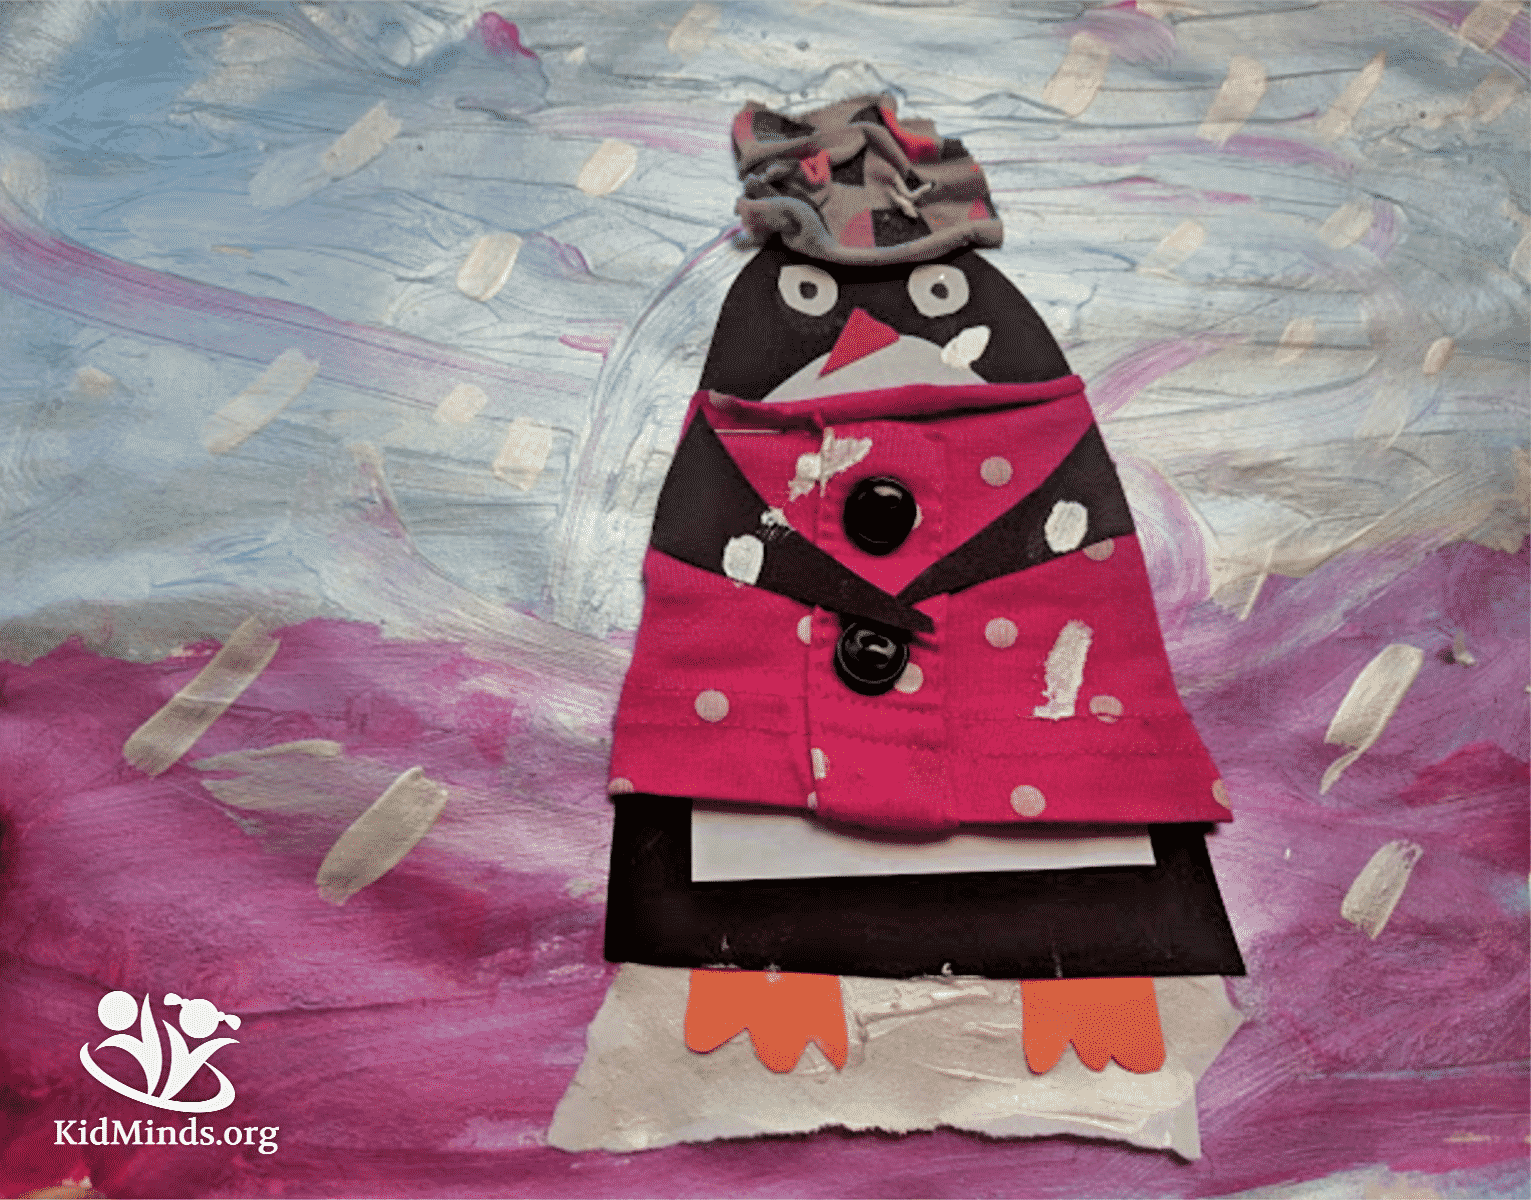
Day 7: Happy Penguin on an Iceberg
This is definitely one of our top favorite projects of all time. We started by painting the background with our new favorite shimmer paints and then added an iceberg. We cut two U-shaped pieces of paper for the penguin’s body and two skinny triangles for the wings. We then had the best time ever dressing our penguins in clothes made out of scraps of fabric. A snowstorm is optional.
There are so many amazing projects, so little time. My kids are asking when the next Art Camp is and if we can do a spring theme. What do you think?
Leave a Reply