Inside: Make your own wind vane (it’s super easy) and discover why a wind vane points in the direction from which the wind is blowing. Plus, cardinal points, spatial reasoning, and what Medieval history has to do with wind vanes.
***
I recently came across this conversation that I wrote down in my notebook a few years ago around this time of the year.
My 3-year-old, “Mom, can I wear new summer sandals?”
Me: “I don’t know. Check the weather.”
My 3-year-old: “How?”
Me: “Peek out of the back door.”
My 3-year-old: “I did. I saw a bird. But I didn’t see the weather.”

That day at dinner when we were discussing the weather, my older kids suggested we make a weather vane (or a wind vane) for him. It was something I had done with them a year before.
Somehow, it turned into our family tradition. We have been doing wind vanes every year ever since.
What I like about the wind vane is that it’s so easy to make with things we already have around the house—paper, pencil, drinking straw, and pin. That’s it!
If you want to have a themed wind vane, then you will also need a template, a picture from a magazine or a drawing. My kids decided on a Darth Vader wind vane this year.
If you want to turn it into a lesson in area and measurement, then throw in a ruler for good measure.
Darth Vader Wind Vane
What is a wind vane?
A wind vane or weathervane is a tool for measuring wind direction. It has two parts: the tail and a pointer (usually an arrow, but it doesn’t have to be). It spins in the wind and points in the direction from which the wind is coming from.
Why doesn’t it point in the direction where the wind is blowing to? We will find out below after we make a wind vane and test it outside.
What you need
Paper (construction paper is better than regular paper, but both will work)
School pencil with an eraser
Drinking straw
A pin
Darth Vader template (optional)
Ruler for measurements (optional)
Disclaimer: this post contains Amazon affiliate links. For more information read my full disclosure policy.
What to do
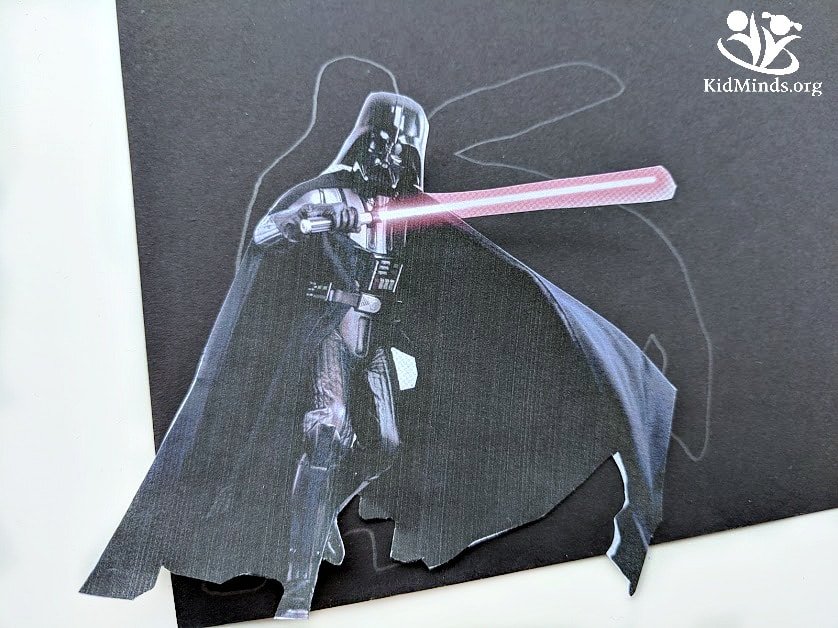
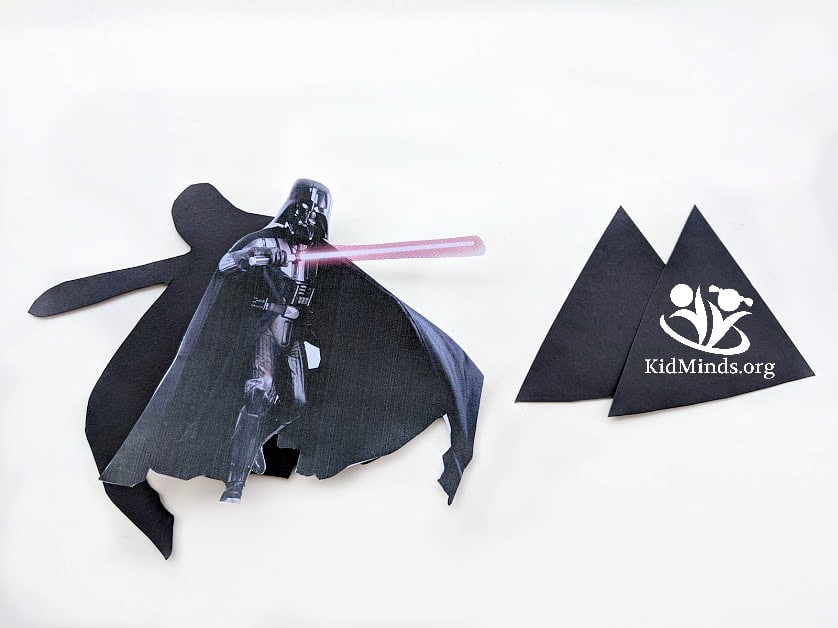
1.Print out the Darth Vader template (ours is 3.5 x 5) and cut it out. Then lay it on top of the black paper and trace it. Cut it out and glue both Vaders together. Darth Vader is going to be the tail of our wind vane.
2.Now we are going to make an arrow for the front end of the vane. Cut out 2 or 3 triangles that are about half the size of Darth Vader and glue them all together. If kids are interested in a measurement lesson, then they can use the ruler to make the calculations more precise. Otherwise, a rough estimation is fine.
The trick
The weather vane works due to two factors: (1) an equal mass on each side, and (2) an unequal area. The number of the triangles you need to use will be determined by the size of your triangles and the weight of the paper you’ve chosen for your project. We needed two construction paper triangles in this project.
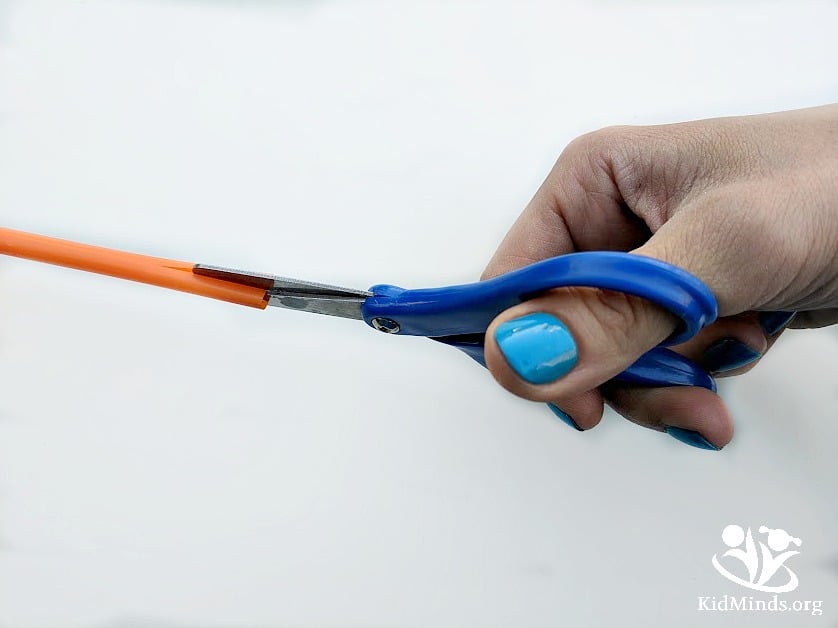
3.Cut half an inch slits at both ends of a straw.
4.Slide Darth Vader and the arrow into the slits. Note: if for some reason it feels wobbly, then glue or tape them in place on both ends (this will keep weight distribution equal on both ends). But you shouldn’t have this problem if you use construction paper.
5.Use a pin to affix the straw to the top of the eraser. Make sure it’s centered and there is an equal space below and above the drinking straw for easy rotation.

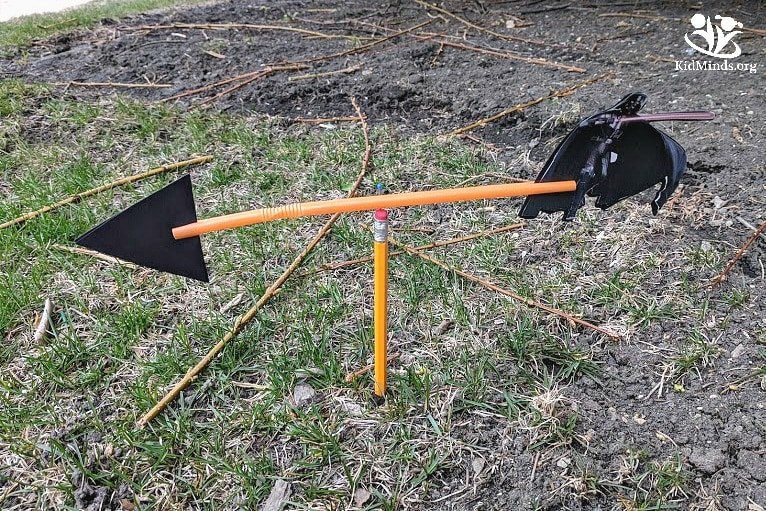
Go outside on a windy day and ask the kids which direction they think the wind is blowing from. Then stick your wind vane into the ground and observe carefully to confirm or refute their guess.
Our wind vane is now in a flower pot that we can see out of our kitchen window. We always know the direction of the wind before heading out.
The Science Behind Wind Vanes
Points of compass
We already know cardinal points in our neighborhood, so we didn’t take any special steps to figure it out. But if you don’t know, you can use a compass to help you figure it out.
Print out our chart that marks not only cardinal points but also intercardinal points (i.e., northeast, northwest …) Put it on the ground in correspondence with compass readings. Then stick the wind vane through the center of it. This chart is in our subscribers-only password protected library of resources. Leave your email here and I will send you the password.

Spatial Thinking
To help kids remember the points of a compass, you can use a mnemonic device like Never Eat Sweet Wheat. We are a mostly gluten-free family, but you can come up with something else, i.e., Never Educate Sad Warthogs.
You can also talk about the points of a compass when you go for walks in your neighborhood. “Turn east at the corner.” “ We are walking north now.” “The bakery is south from here.” This will develop your kids’ spatial thinking. According to a National Geographic article, I read recently, experts believe that even in the world of GPS, the ability to make sense in our world without special devices is very important. It’s not just about navigation. Spatial thinking plays an active role in a wide range of activities from understanding metaphors to making sense of molecules and geometry.

Why a Wind Vane points in the direction FROM which the wind is blowing and NOT where it is blowing?
If you ever made a wind vane and a windsock and put them next to each other on a windy day, you might be fascinated to discover that while the windsock points in the direction the wind is blowing to, the wind vane does the opposite. It points in the direction the wind is blowing from!
So if the wind is blowing from the north. The wind vane would point toward the north, and the windsock would be point south.
Why?
You might remember the concept of a path of least resistance from your high school physics class. The same principle applies here. The point of least resistance points into the wind. The tail of the wind vane is bigger than the front, making the front end the point of least resistance.
For the wind vane to work correctly, the weight on each side of the vane must be of equal mass! However, the area of the ornaments on the opposite sides of the vane must be unequal, forcing the point of least resistance to face into the wind.

Historical Note
A wind vane has many names. You might have heard weathervane or weathercock.
The word “vane” comes from the Old English word “flag” because original vanes were fabric banners attached to medieval towers to show the direction of the wind.
It is one of the first weather tools ever used. As long as there were farmers and fleets, fishermen and armies, there was a need to know where the wind is coming from. Ask the kids how knowing the direction of the wind could help farmers and sailors.
Final Words
Are you thinking what I am thinking? Wind vanes make for the best lesson on weight, area, balance, and Medieval history. In addition, they are a great introduction to physics and the kids actually will be begging you for more. We still haven’t made a cat and a mouse wind vane (bigger cat at the tail chasing the small mouse in the front). Have you ever made a wind vane? Share in the comments below! We would love to hear about your experience.
Recent Posts


Great lesson. Thank you.
I just recently made a theme wind vane from scrap metal.
I cut out a profile photo of our pug and transferred the image to some 14 gauge metal.
I used an old bicycle head bearing for the pivot and cut the N,S,E,W letters from scrap metal as well.
I should have read up on the physics of it before making it. But no matter it was only a theme to show my love of the Pug breed.
I found the balance point and welded it together, mounted it on top of my shed. It works well, but points in the direction the wind is blowing.
This was an informative article.
I would post a photo but find see an option for that?