Inside: Exploring ramps with match cars is an exciting, outside or inside, activity for kids of all ages. All you have to do is build a ramp (or two) with things you already have in the house and race your match cars. We have included two printables to make it even more fun (and educational).
Before we commence with the festivities, let me ask you this: Have you seen the list of the Top 100 Kids Activities Blogs? Check it out! Kid Minds is #56.
Building Ramps
Recently I asked my kids why they were not playing with their match cars anymore.
“Boring,” said my kids.
“How about building ramps for them?” I asked.
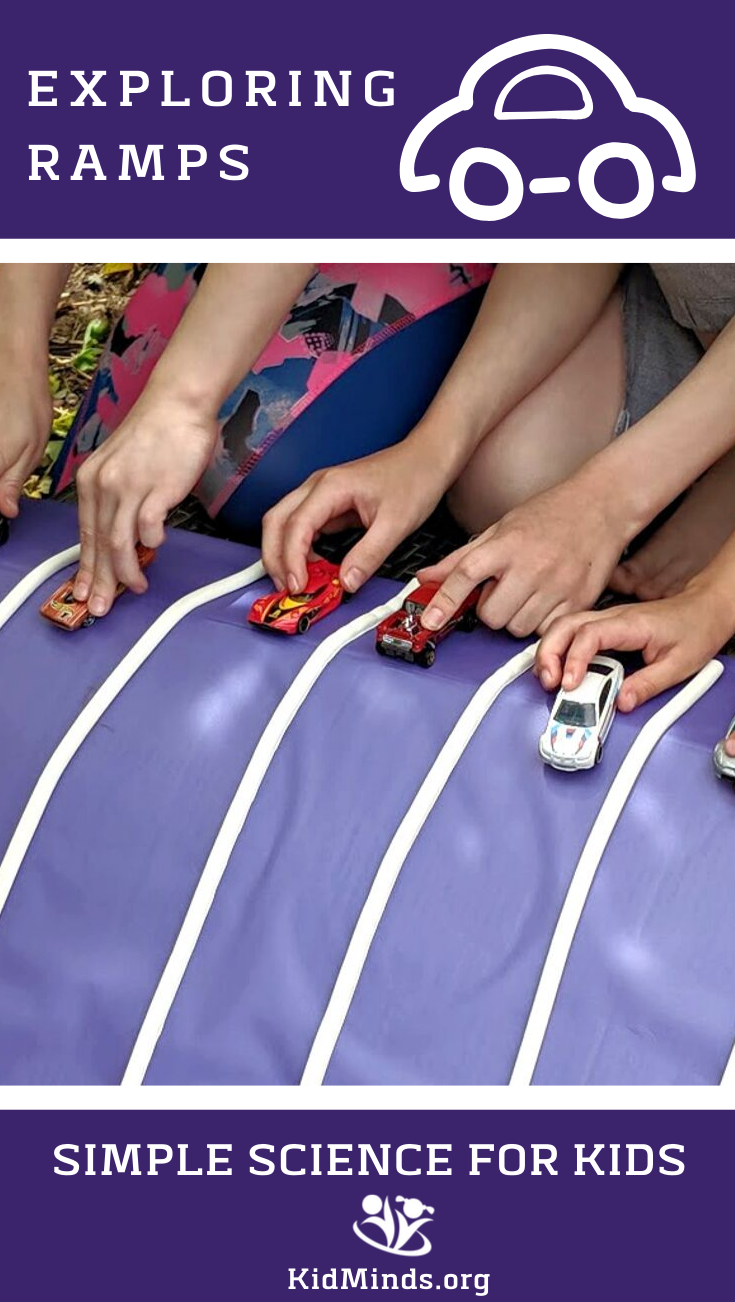
We ended up building a dozen varieties of ramps, experimenting with materials, friction, and incline angles. Some materials we tried: shelves from the book cabinet, a yoga mat, a cookie tray, aluminum foil, and a rubber “welcome” mat. Our favorite ramp was made out of an Amazon box, self-adhesive wallpaper (for decoration), and insulation foam. It led to hours and hours of fun inside AND outside. My toddler was especially delighted with it and played for days.
To make it even more engaging for older kids, the next day we added a tape measure, a stopwatch, and a recording sheet. It counted as math for the day, so they were happy.
Let me share this design with you!

Ramp Supplies
Disclaimer: This post contains Amazon affiliate links. I get a commission from qualified purchases.
- A box (we used an empty Amazon box)
- Self-adhesive wallpaper (It’s great for crafts. I had this purple one left from a tiny remodeling project I did last year.)
- Self-adhesive Insulation foam tape (I bought some at the beginning of winter to insulate our library, which in winter months is more commonly referred to as an “icebox.” “Where is the Mark Twain book?” “In the icebox.” Very confusing for our guests 🙂
- Variety of toy cars
- Stopwatch, measuring tape, and Measuring Distances recording sheet (optional, but a lot of fun with older kids)
- Race Recording Sheet

What to do
- Determine how many materials you want to use/test and gather the supplies.
- Cover the box with wallpaper to make the surface (sort of) even. My kids helped and we used bits and pieces left from previous projects, so – as you can see in the pic above – our ramp is kind of bumpy.
- Secure insulation foam to the ramp.

Exploring Ramps
Start with letting your kids explore the ramps as they wish. We added more ramps as we went and experimented with the size to see if bigger cars would go down slower or faster.
Once the excitement died down, I asked
- How can you make a car go down the ramp slower/faster?
- How can you make the car go farther?
We made some predictions, tested different inclines, and measured the distance the cars went. Then we also added bumps (with insulation tape) and measured the distance again.
To help my toddler not get in the way when we got to measurement, I asked her to lie on the ground along the ramp to see if the car could reach her toes, or, when she flipped the other way, to reach her nose.
We recorded our measurements and talked about the results. You can print out our Measuring Distances sheet.

Books
Some of the books that inspired our investigation:
Roll, Slope, and Slide, Michael Dahl
Ten on the Sled, Kim Norman
The Little Engine that Could, Watty Piper
and The Runaway Pumpkin, Anne Margaret Lewis.

Variations
You can add textured materials to add friction. If you are doing it outside try glue and soil! This was a huge hit with my kids. You can also try pieces of fabric, aluminum foil, sandpaper, a spoon taped to the box horizontally, etc.
Our ramps’ investigation continued well throughout the week. More things to slide down the ramp were added in the process – leaves, stones, sticks, and pencils.
The kids were having lots of fun and didn’t even realize they were learning the basic principles of engineering and lots of science concepts (friction, angle, gravity, and more).
I created one more printable to record which car came first in each race round Race Recording Sheet.

Leave a Reply