Inside: This tissue box catapult is a snap to make, and it’s so addicting! No one (even adults) can resist playing with it for hours! Detailed instructions, a simple scientific explanation, and science printables are included below.
We all end up with an empty box of tissues now and then. Why throw it away when you can transform it into so much fun?!
I was surprised to discover that while there are a couple of blogs with instructions on how to make catapults with a large tissue box, there wasn’t one for a small box. I only buy small boxes, so it’s more relevant for us.
We love our small tissue box catapult and use it a lot!
If it sounds like a lot of work, consider this: laughter, happy shouts, kids chasing pom poms, perhaps dogs barking, and the china cups in kitchen cabinets shaking… and why are all these things happening?

Your kids are having a ball with tissue box catapults! Happy memories are in the making!
There are infinite ways to create good childhood memories for your children. But on any boring day when you need a good idea, tissue box catapults to the rescue.
Easy. Educational. Cheap.
That’s why I keep sharing catapult ideas with you. We’ve made Ewok catapults, classic catapults, LEGO catapults, and nature-inspired catapults. Now it’s time for tissue box catapults!
8 Benefits of Making Tissue Box Catapults
- Increased Attention Span
- Fine Motor Skills
- Problem-Solving
- Science Concepts (projectile motion, stored energy, tension, transferred energy, …)
- Cooperation and Communication with Others
- Improved Hand-Eye Coordination
- Builds Confidence
- Encourages Creativity
Tissue Box Catapult

What you need
Catapult supplies:
2 pencils
Small tissue box
Milk carton cap
Rubber bands
Ammunition (pom poms, marshmallows, etc.)
Crayon or something similar
Stones (optional for stability)
Special tools:
Glue gun
Scissors
Hole punch
Tape (or use a glue gun)
Optional:
Decorative supplies like paints or pretty tape
What to do
We made you a video to make it easier to follow the instructions. I promise it’s not as hard as it sounds.
1. Make two holes in the tissue box.
With a hole punch, make a hole on each side of the box close to the top edge. Just to make sure it fits well, I stick a pencil through the hole and wiggle it around.

2. Connect two pencils with a rubber band.
Make a cross with the two pencils and use a rubber band to keep them that way. The vertical pencil is the arm of the catapult; the horizontal piece is the frame.
3. Add a second rubber band.
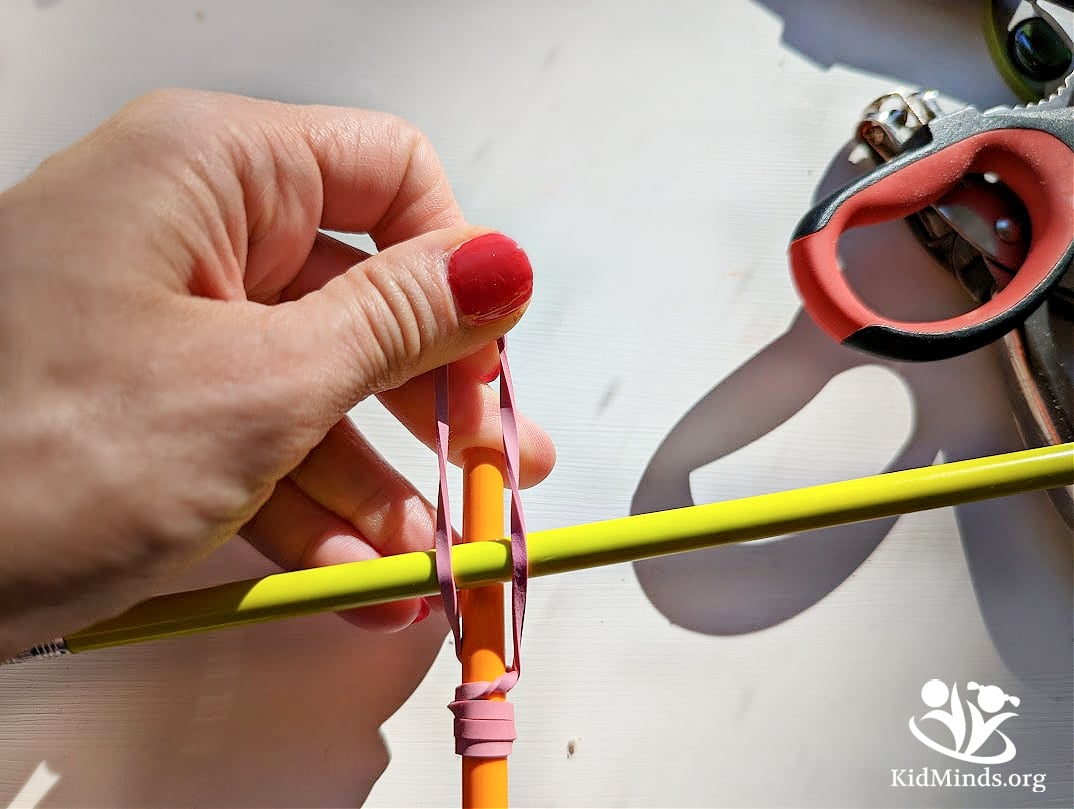
Attach a rubber band to the vertical pencil (arm). The easiest way is to tie a knot and then pull the knot on the pencil, pulling it tight to fit snuggly. Leave the loop hanging; we will pull it through the box in step 5.

4. Insert a pencil.
Put a horizontal pencil (the frame) through both holes in the tissue box (we made it in step 1).

5. Make a third hole, and pull the second rubber band through it.
Make a little hole with the tip of the scissors in the top half of the box on one more side.

And pull the rubber band (from step 3 above) through.

If your rubber band doesn’t stretch far enough, double it. If the rubber band is not tight enough, wrap it around the pencil a couple of times to make it shorter.
6. Secure the rubber band in place.
We need to attach this band from step 5 to the outside of the box since that’s what creates tension and the pivot. Pull a crayon or a short stick through the rubber band loop.

And tape it to the box.

The idea is that this rubber band doesn’t slide back inside the box. If you want this catapult to stand up to hours of use, add an extra rubber band around the box to hold the crayon in place.

7. Make a bucket.
Attach the milk cup to the vertical pencil with the glue gun to serve as a loading bucket.

Voila!

FEELING CONFUSED? CHECK THE VIDEO!
The Science of Catapults
We talk a lot about catapults in many previous posts, but in case you just need a quick recap, here is how catapults work:
Catapults are all about storing up energy in some form and then releasing it, i.e., converting potential energy into kinetic energy. The more energy you manage to store before the release, the farther the projectile will fly.
Catapults come in a few forms. The simplest might be a slingshot. You pull back on a taught, resistant cord, along with your projectile, building up potential energy, then suddenly releasing it when you let go, and the cord snaps back into place with a vengeance.
In ancient Greece, a device called a “ballista” stored energy in the form of twisted ropes that, when cut, would rapidly untwist and fling a spear. The Romans gave us more familiar-looking catapults that would use a counterweight to store potential energy that, when released, would move an attached arm that flung the projectile forward.
In all cases, including our rubber band and pencil setup, it’s the sudden conversion of potential into kinetic energy that does the trick.
Do you need science pages to go along with this activity?

If you want to turn this into a complete science lesson, you need the STEM-101 pack below.

Do you want some juicy catapult discussion questions for your activity? We have them here! Just scroll down to the science section at the end of the post.
Catapult Shooting Points Score Cards
We like to turn catapult play into a fun shooting game. We’re competitive like that 🙂

Catapult Challenge
Who doesn’t like a good challenge? Such as Parents Vs. Kids below!

Leave a Reply