Winter is all about snowman for my kids, but this year we haven’t had snowman-making snow yet. We compensate by doing lots of snowman crafts.
I have told you earlier about my love of paper-mâché projects, so don’t be surprised when I tell you that when I saw an empty apple juice bottle in my mind’s eye I saw it covered with paper and turned into a cute paper-mache snowman. And once we made a snowman we decided to add a snow-woman and throw in some snow-kids for good measure.

All you need are three things: (1) newspaper, (2) glue and (3) plastic bottle. Take bits of newspaper and glue it to the plastic bottle. Voila! For a smoother finish, you can make the final layer out of printer paper, but I only recommend it, if you are making a snowman as a present and want it to look store-bought perfect. For decoration, you can paint with white color, add eyes, hat, scarf, and buttons.
This project is great for artistic expression. My kids had a lot of fun designing their snowman babies and making them. There is a lot going on: tearing, gluing, making decisions about where each piece is going, smoothing it out, imagining the final product.
In addition, if you are using hands for scooping up glue (and not a spoon), it’s a great sensory experience. We love sticking our hands in glue and smoothing out the wrinkles. We can do it all day! I like that the final product is a sturdy 3D toy. In fact, paper-macher toys last years.
What you need for paper-mâché Snowman
- Empty plastic bottle
- Glue (flour, water, and salt)
- Newspaper + (optional) one sheet of printer paper for the top layer
- For decoration: white paint (for the body), black paint (for eyes and buttons), scarf and hat (I crocheted ours)
![]()
How to make papier-mache glue (for 1 snowman)
- 1/3 cup all-purpose flour
- 1/3 cup water
- 1 TBSP salt
Stir together all the ingredients until smooth, bump-free mixture is formed. If it seems to thick to you, add an additional drop of water.
![]()
How to make a paper-mache snowman
- Tear a small piece of newspaper.
- Cover it with glue.
- Stick paper to the plastic bottle and smooth it out.
- Cover the bottle completely.
- Let it dry overnight.
- Repeat with more layers, if desired.
Note: One layer makes a fine snowman, but more layers mean a sturdier drop-resistant toy. My 7-year old loves doing it so much, he said, I need to make at least five layers. And he did just that!
Note: if you don’t let it dry completely between layers, the snowman will get moldy.
Note: depending on the quality of the newspaper you are using for your projects, you might want to avoid using the edges of the newspaper as they often don’t blend very well.
![]()
Note: Any time your glue gets too thick, just add a drop of water to thin it out.
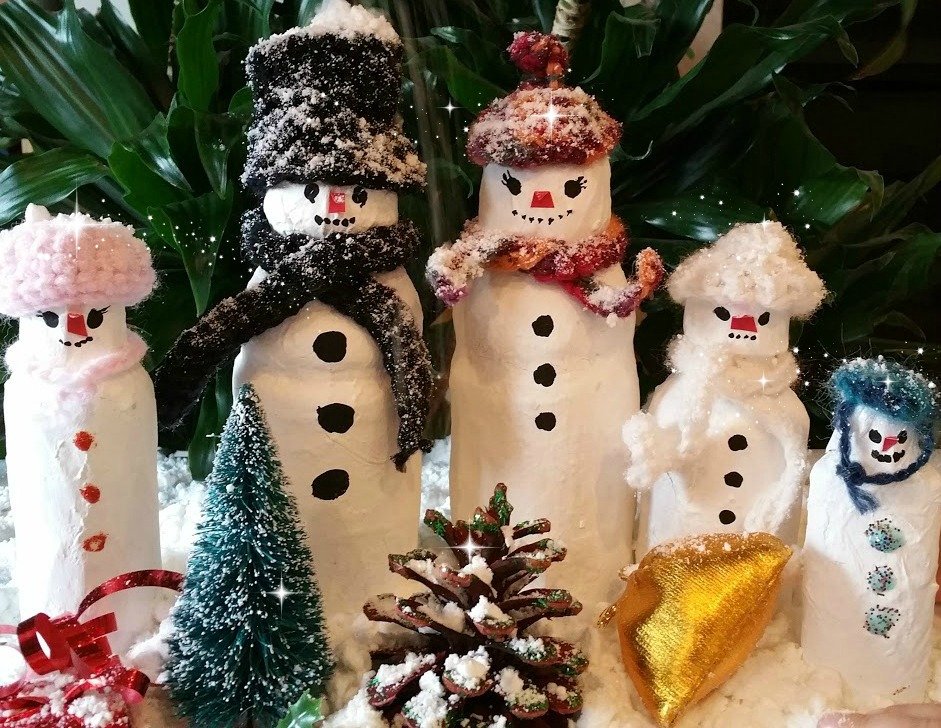
Copy our decorations or invent your own. I think our snowmen are awfully cute if I can say so myself. The baby turned out a bit grumpy perhaps.
How to decorate a paper-mache snowman
Here you are in the land of endless possibilities. This is what we did:
- Painted snowmen white and let them dry overnight.
- The next day we painted on eyes, mouth, and buttons. Some buttons were made using glitter glue.
- Added crocheted hats and scarfs.
- Added a red nose: red construction paper triangle bent in half and glued on with regular school glue.
Oh no! It’s snowing especially hard today! (It’s baking soda, lol).

Watch our video for inspiration!
What fun projects. I remember paper-macheing balloons when I was young.Thank you for sharing this at #100HappyDays!
I can’t remember the last time I got to work with paper mache. :'( I miss being a kid! I used to volunteer at a children’s hospital in therapeutic recreation/child life and it was an awesome excuse to get to goof off with the kids there! :]! Great tutorial!
I love this. Recycled crafts are my favorite. These snowman are so cute. Yes perfect for this time of the year. 🙂 Another great idea. 🙂 I also loved your video.
The kids love crafts.