Inside: Fun, hands-on science activity to simulate the action of tectonic plates and learn more about earthquakes, mountains, and volcanoes.
If there’s one ingredient that we all have stuffed somewhere in the back of one of our kitchen/pantry shelves, it’s Jell-O.
Am I right?
Jell-O comes in all sorts of beautiful colors, and it’s perfect for a wide variety of hands-on activities for our kids. We love making Jell-O playdough, adding it to our vinegar explosions, and mixing it with tonic water for glow-in-the-dark Jell-O. Oh yeah!
Today though, we are using Jell-O to talk about earthquakes, volcanoes, mountains, and plate tectonics.

The Science of Plate Tectonics
Plate tectonics is a scientific theory that holds that Earth’s outer layer is made up of large, moving pieces called plates. We can’t feel it, but most of the plates that make up Earth’s crust (including ours) move continuously in different directions and at different speeds, a few inches each year.
The fun part is that those plates are moving over the layer under them that’s made up of molten rock, hot semi-liquid material beneath the surface of the earth.
And you know what?
We discovered that gelatin – the main component of Jell-O – has a consistency that is perfect for simulating molten rock for hands-on learning fun. It sways, jiggles, vibrates, and (under pressure) erupts on the surface.
This means we can simulate the action of tectonic plates in our kitchen and experience the world of earthquakes, mountain formations, and volcanoes on a (thankfully) very small scale.
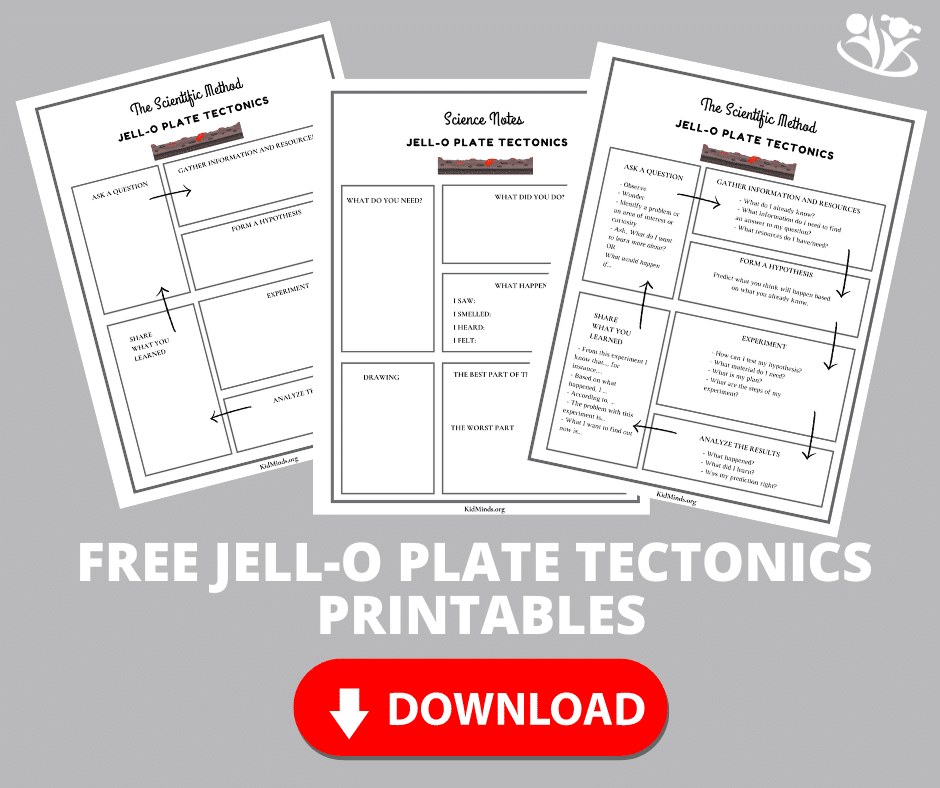
The Jell-O Plate Tectonics (+ Science Printables)
What you need:
Flatbreads or Graham crackers (we like the grain-free kind)
8×8 inch pan to cool Jell-O in the fridge
Wax paper
2 8-oz packs of Jell-O* (red is best to mimic the color of molten lava)
Mixing bowl
Water
Spoon
Measuring cup
Knife
Optional:
Baking soda
Vinegar
*Important Note: when you’re done with the experiment, double bag your remaining mixture and put it in a garbage bin. Jell-O contains gelatin, and anything with gelatin has the potential to clog your drain.
⬇️⬇️ Check out some other Kid Minds activities ⬇️⬇️

The Jello Plate Tectonics: Step-by-Step Instructions
Getting Started
- Make sure to prepare your Jell-O a day in advance. Line the Jell-O pan with the wax paper, extending it over the edge for easy grabbing.

2. Prepare Jell-O according to package directions. We stirred 2 cups of boiling water with powder in a mixing bowl, added 2 cups of cold water, and poured the mixture into the pan.

3. Refrigerate for at least 4 hours.
4. (Optional step for you if you want to imitate the volcanic explosion in Divergent Boundaries below). Pour baking soda on the tray.
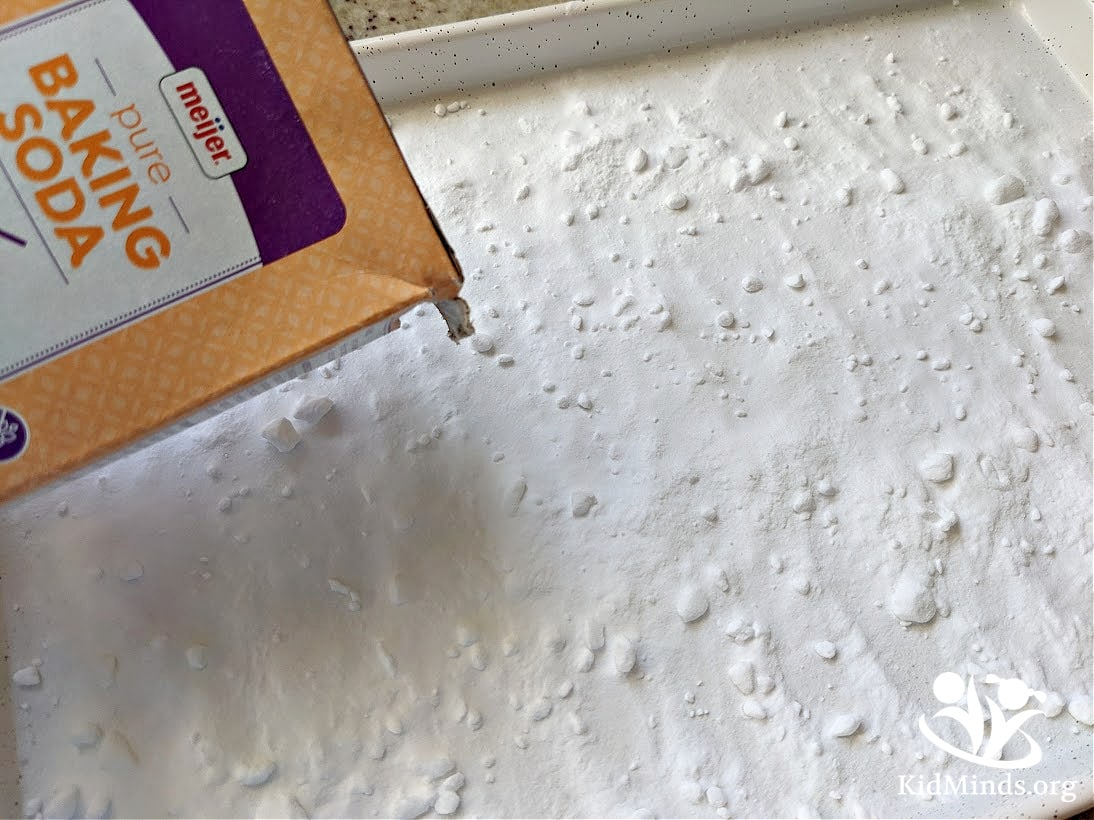
5. Remove the Jell-O from the pan (by pulling up the wax paper) and invert it on top of baking soda (if not using baking soda, simply place it in the tray (you don’t have to invert it).
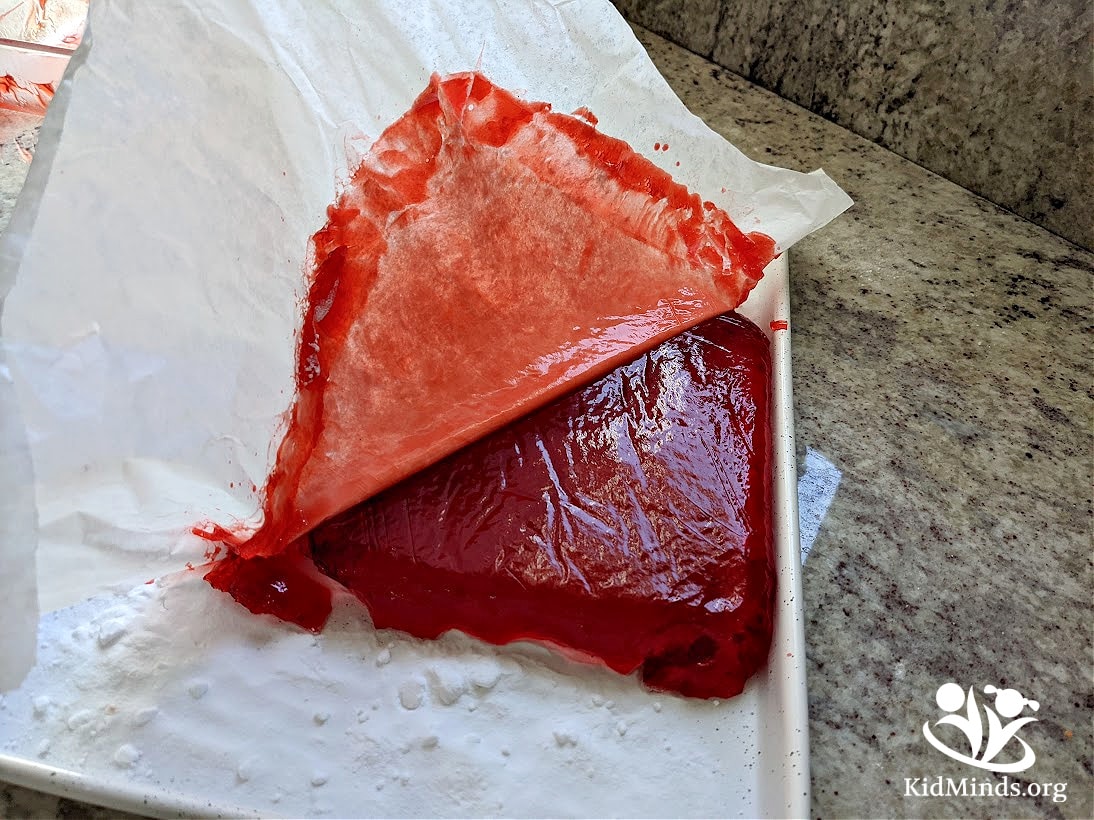
6. With a wet knife, cut Jell-O into two parts right down the middle of the tray.

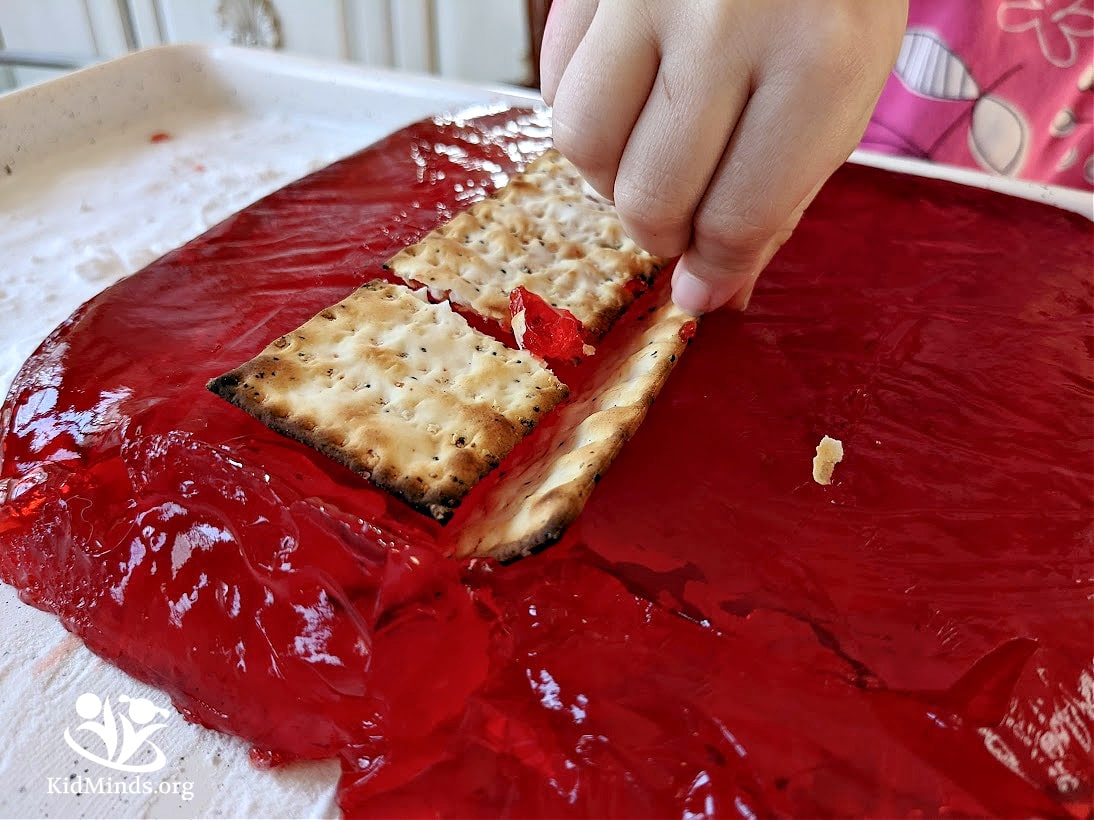
7. Place two flatbreads (or Graham crackers) on each side of the cut.

We’re ready for the exciting hands-on exploration!
Tectonic plates can move in three directions: they can slide against each other, collide, or move apart. We’re going to simulate all three scenarios.

Transform Boundaries
Invite kids to slide one flatbread along past another piece that you’re holding steady. A cracker might crack from too much pressure. It’s ok.
A transform plate boundary occurs when two plates slide past each other horizontally. Rocks that line the boundary are pulverized as the plates grind along – you might notice some cracker crumbs forming along the edge.
Watch how Jell-O vibrates and jiggles. This molten rock is where earthquake vibrations originate and travel. The rubbing of one plate against the other causes waves of energy.
Earthquakes are waves of energy that travel through the Earth. Over 90% of all earthquakes – and all of the most destructive ones – happen at or near plate boundaries (the places where plates meet are called faults or fault lines).
Convergent Boundaries
Invite kids to crush flatbreads together while applying downward pressure on them and then slide one cracker under the other.
When the edge of one tectonic plate slides under and into the mantle beneath another plate, it subducts. The plate that goes under slowly descends into the Earth’s mantle, melts, and then this molten rock wells up and erupts. When the magma rises up to the surface, it forms chains of volcanoes.

Do you see the pieces of gelatin breaking off and popping up through the cracks? Just remember that the actual tectonic plates are hundreds of miles long and that the molten rock is extremely hot, about 1,000 degrees Celsius (or about 2,000 degrees Fahrenheit).
However, that’s not all. Sometimes when two plates crash into each other, none of the plates goes under. What happens instead is that the two plates simply smash into each other, pushing upward and creating mountains!

To make our crackers more pliable, we placed the sides that were touching each other into the water for a few seconds. Then we pushed the soggy sides together to make a mountain ridge.

Do you see how the crackers created a bump? That’s our mountain ridge. My kids loved using their hands to mush the crackers together.
Fun fact:
Real mountains take millions of years to form. It’s estimated that it took about sixty million years for Mount Everest to form and reach its current height.
Divergent Boundaries
Finally, divergent boundaries are formed when plates diverge, that is, move away from each other.

Put two fresh crackers on top of Jell-O and pull them apart while applying slight downward pressure. You can also use that kitchen knife to push the Jell-O’s sides away from each other.
As the two plates separate, magma from deep within the Earth rises, creating volcanoes or volcanic islands.
If you are doing the optional (baking soda) step with us, pour some vinegar into the crack between the “plates.”
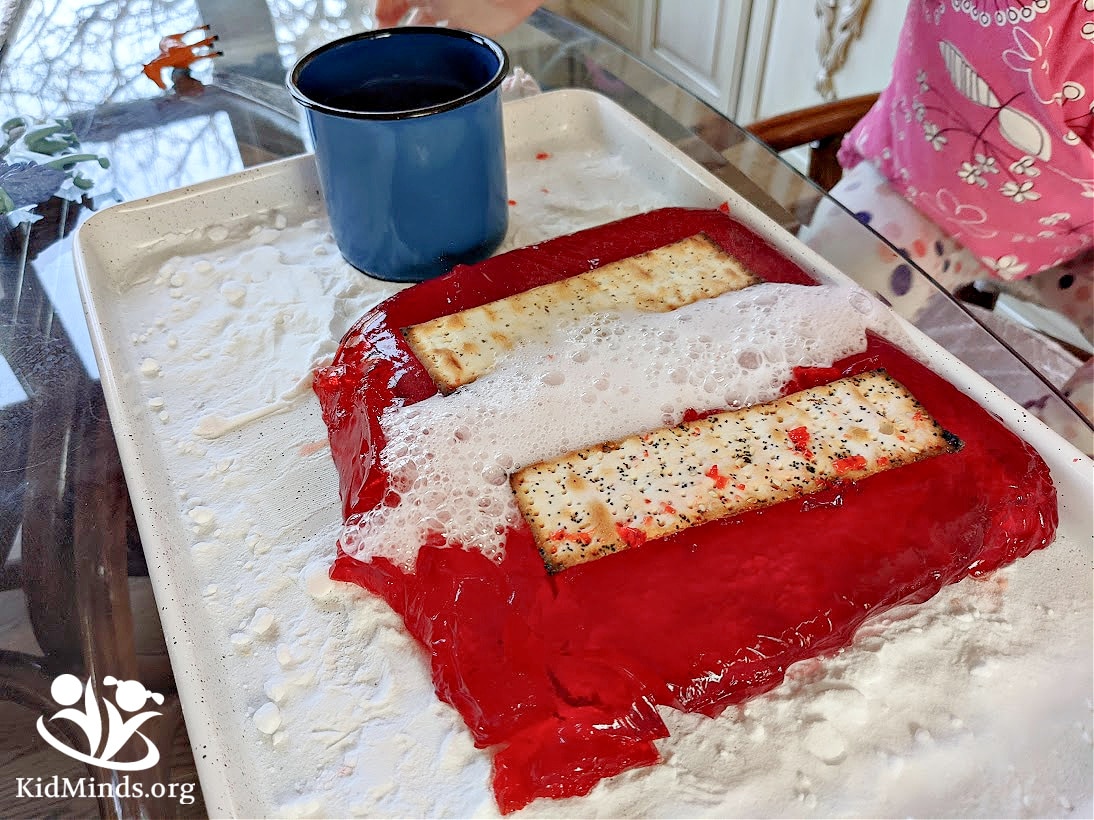
You can repeat this step again and again. Add more baking soda to the crack between the crackers.
Add more vinegar.
If you want, you can add red food coloring to the baking soda to make realistic hot red magma! I didn’t do this simply because I knew that once our Tectonic Plates experiment was over, my youngest would be doing some hands-on sensory exploration with it, and I didn’t want her hands to turn red.

I think here her poor little animals are floating on rafts to escape the hot lava.

It doesn’t look like they made it.

How did the experiment go for you?
All my four kids thought it was a super fun way to explore the features and movement of Earth’s surface. Mountains, volcanoes, and earthquakes are all exciting topics for kids (and many adults) to learn about. It’s even more exciting when you can use your hands to simulate a hands-on experience.
Need some science printables to go with this activity? We got them! Click the link below to download.
Ready to go deeper? We have a full STEAM 101 pack for you!
Want to learn more about earthquakes? We have a FREE printable Earthquake crossword puzzle!
We also recently built an amazing Seismograph from a shoebox and a can of coconut milk. Would you be interested in reading more about it? Let me know, and we can repeat the activity so that I will have some photos for you.
Save the image below ⬇️ for later!

Leave a Reply